

Kling Elements: Using Reference Images
How Kling Elements work: building one from a frontal image plus 1 to 3 references, the Omni reference limits, @ prompt names, and sending images on OceanToken.
By OceanToken Team
Editor's note: Elements are Kling's answer to getting the same person or product twice, and in our view most drift problems we hear about trace back to the reference set, not the prompt. Treat those few images as an asset you version like code. One caveat up front: stored elements are a feature of Kling's own API. On OceanToken today you send reference images with each request instead.
Short answer: Kling Elements are reusable subjects, stored once in Kling's own API and called by element_id and @ name. An image element is one frontal image plus 1 to 3 other angles. OceanToken's video guide documents only per-request input_references images, so there you send the references each time. Keep one subject per reference set and check the model's limit.
What Kling Elements are
Kling's Elements API for 3.0 Omni lets you create a named entity once and reuse it. You send POST /v1/general/advanced-custom-elements with a name (up to 20 characters), a description (up to 100), and a reference_type. The task runs asynchronously and returns an element_id when it succeeds, which you then pass to a generation request.
There are two kinds. A multi-image element (image_refer) is built from a required frontal_image plus 1 to 3 additional reference images, and Kling says those extras must differ from the front. A video character element (video_refer) is built from one clip of 3 to 8 seconds, 1080P, 16:9 or 9:16, up to 200MB. The page limits video elements to realistic humanoid figures and to newer model versions, and a clip with human speech also triggers voice customization. Elements can carry tags (character, animal, item, costume, scene and so on), which helps once a library grows past a dozen entries.
Plain reference images are the lighter option. You attach them to one request and refer to them by position, and nothing is stored for next time.
Reference limits that decide your design
The numbers live on Kling's 3.0 Omni video page , and they interact, so it pays to read them before you plan a scene.
| Request shape (3.0 Omni) | What the docs allow |
|---|---|
| No reference video, multi-image elements only | Reference images plus elements: at most 7 |
| No reference video, video character elements only | At most 3 video character elements |
| No reference video, both element kinds | At most 3 video elements; images plus multi-image elements at most 4 |
| With a reference video, multi-image elements | Images plus elements: at most 4 |
| With a reference video, video character elements | At most 1, and not mixed with multi-image elements |
| First frame, or first plus last frame | At most 3 elements; last frame alone is not supported |
Images must be jpg, jpeg or png, at least 300px on each side, with an aspect ratio between 1:2.5 and 2.5:1. Element source images are capped at 10MB; images sent with the video request can be larger. Other Kling versions (O1, 4.0) have their own pages with their own limits, so a number that is true for 3.0 Omni is not a promise for the model id you actually call.
The practical consequence: a two-character scene with a product and a location plate is already four references. Add a first frame and you are at the three-element ceiling. Plan the cast before you write the shot list.
Building an element, step by step
These steps follow Kling's own Elements API; on a per-request reference route, apply the same rules to the images you send in input_references and check the result on one short clip.
Start by deciding the element's single job: one person, one prop, or one location. Mixing two outfits or two people into one element gives the model two answers and it will blend them.
Then collect images that agree with each other. Use the same outfit, even lighting and no heavy filters, at a similar resolution. Your frontal image carries the most weight, so make it the sharpest one. For the 1 to 3 extra angles, include at least one view your planned shots will need, such as a three-quarter view for a dialogue scene; if every reference is straight-on, profile shots are where identity slips. Remove watermarks, captions and app UI, because the model can reproduce them as if they were part of the subject. Crop out other people.
Name elements by role, such as barista or customer, and keep names distinct. Kling's docs warn against names that are substrings of each other (@Zhang and @ZhangSan) and against names that also appear in the prompt text, such as @gmail in a prompt that contains an email address.
Finally, run one short, simple clip, a walk toward camera, before you commit a sequence to the element. It is the cheapest way to catch a bad frontal image.
Writing Kling element prompts with @ names
This section describes Kling's own API. On another endpoint, test @ naming on a short clip before you depend on it.
On 3.0 Omni, prompts refer to inputs with @ names: @image_1 for an attached image, the element's name for an element, @video_1 for a video. The prompt can be up to 3,072 characters, and Kling recommends staying under 2,500.
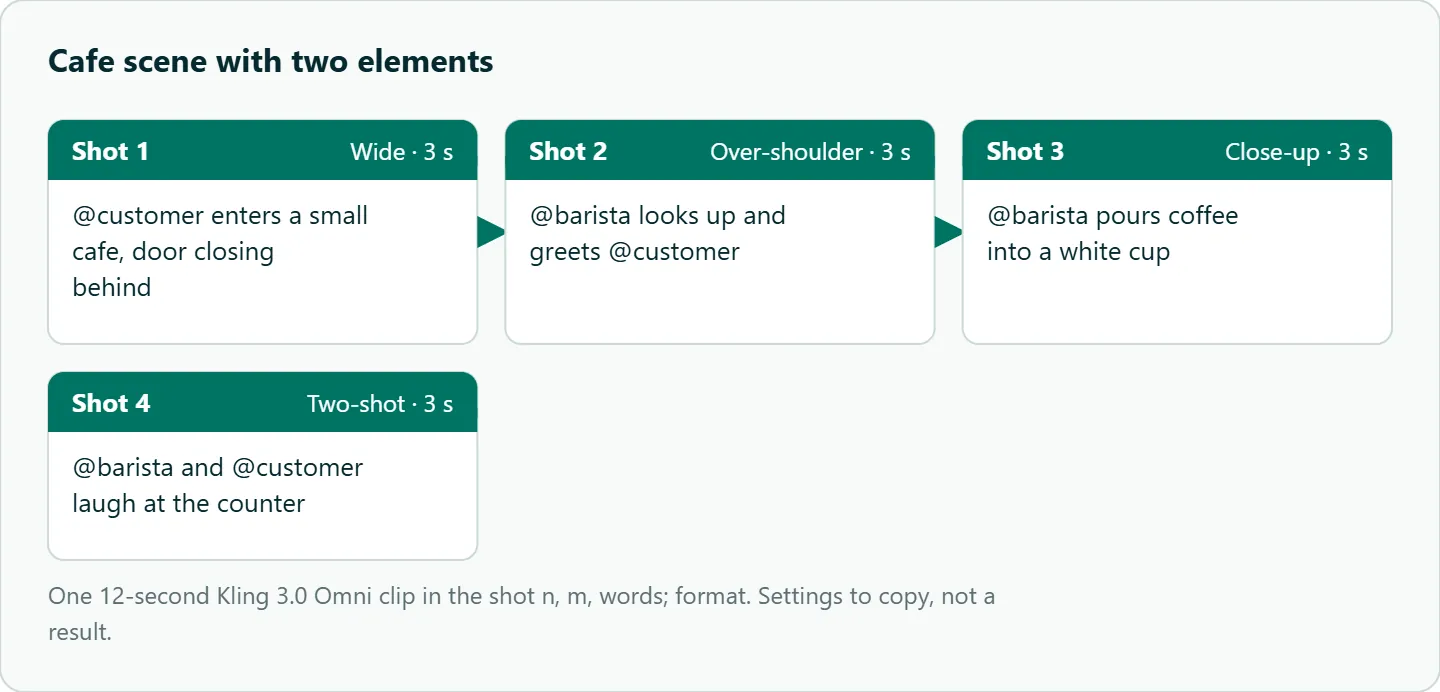
A few rules follow from how references work. The element already carries appearance, so spend the words on action and camera: "@barista slides a cup across the counter to @customer, slow push-in" reads better than three lines describing hair and clothing. Don't contradict the reference. Writing "blonde" against a dark-haired frontal image leaves the model to choose. One element per subject, always.
For multi-shot clips, the same page documents a "shot n, m, words;" format with 1 to 6 shots, each at least 1 second, totaling the clip duration, with up to 512 characters per shot. That is where two elements earn their keep, because the identity has to survive cuts.
The storyboard in this section is one 12-second clip. A prompt in Kling's documented format would be the following; we haven't confirmed that this shot syntax reaches the model on every endpoint, so test it on yours first:
shot 1, 3, wide: @customer enters a small cafe, door closing behind;
shot 2, 3, over-the-shoulder: @barista looks up and greets @customer;
shot 3, 3, close-up: @barista pours coffee into a white cup;
shot 4, 3, two-shot: @barista and @customer laugh at the counter;
Elements vs image-to-video vs reference images
These three are easy to confuse, and they solve different problems.
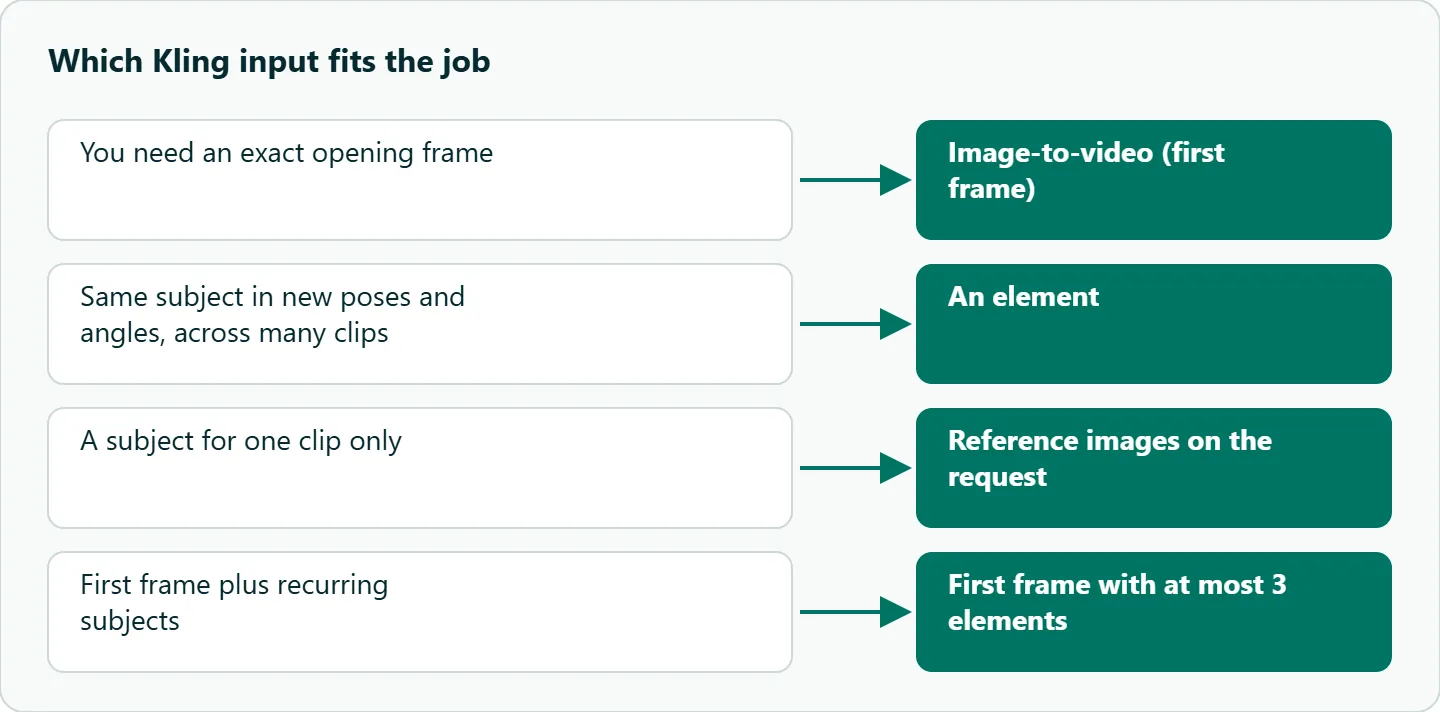
| You need | Use | Why |
|---|---|---|
| An exact opening frame | Image-to-video (first frame) | Fixes frame one; motion after that is free |
| The same subject in new poses and angles, across many clips | An element | Identity is stored once and reused by name |
| A subject for one clip only | Reference images on the request | No setup step, nothing to maintain |
Image-to-video fixes the first frame and nothing else. An element keeps identity while letting the camera and pose change, which is what a series of product ads or a recurring character needs. Reference images on one request sit in between: fine for a single clip, tedious once you are re-sending the same four files to every job. This table is our reasoning from the docs, not a test result.
Debugging drift
When identity slips, the cause is usually visible in the reference set. Read the symptom first, then change one thing.
| Symptom | Likely cause | Fix |
|---|---|---|
| Face shifts between shots | All references from one angle | Add a three-quarter view |
| Outfit changes | Mixed outfits across references | One outfit per element |
| Two characters blend | Similar names or overlapping descriptions | Distinct role names, one element each |
| Prop gains extra parts | Cluttered background in the reference | Clean cutout on a plain background |
| Logo or caption appears | Text left in a reference | Remove it, unless you want it reproduced |
These causes and fixes are our reasoning about how references work, not tested results; change one thing at a time to confirm which applies to you.
How to test this on your workload
We haven't published a test for this article, so here is a small one to run on your own subject. Keep the prompt fixed, change only the reference set, and judge identity from face and outfit crops rather than the whole frame.
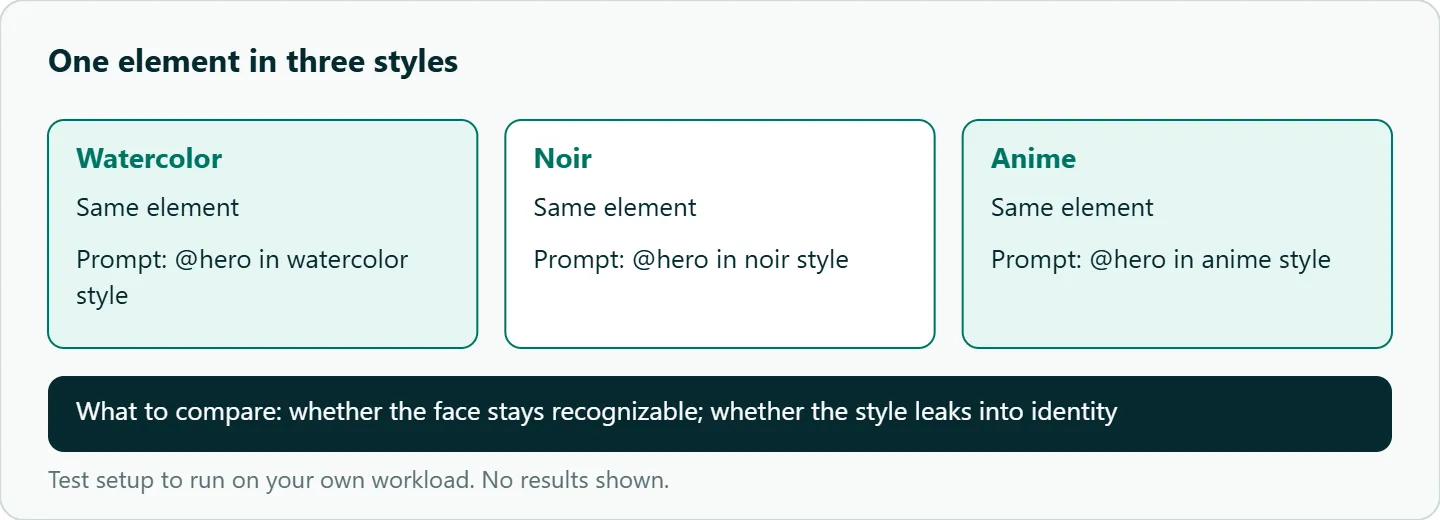
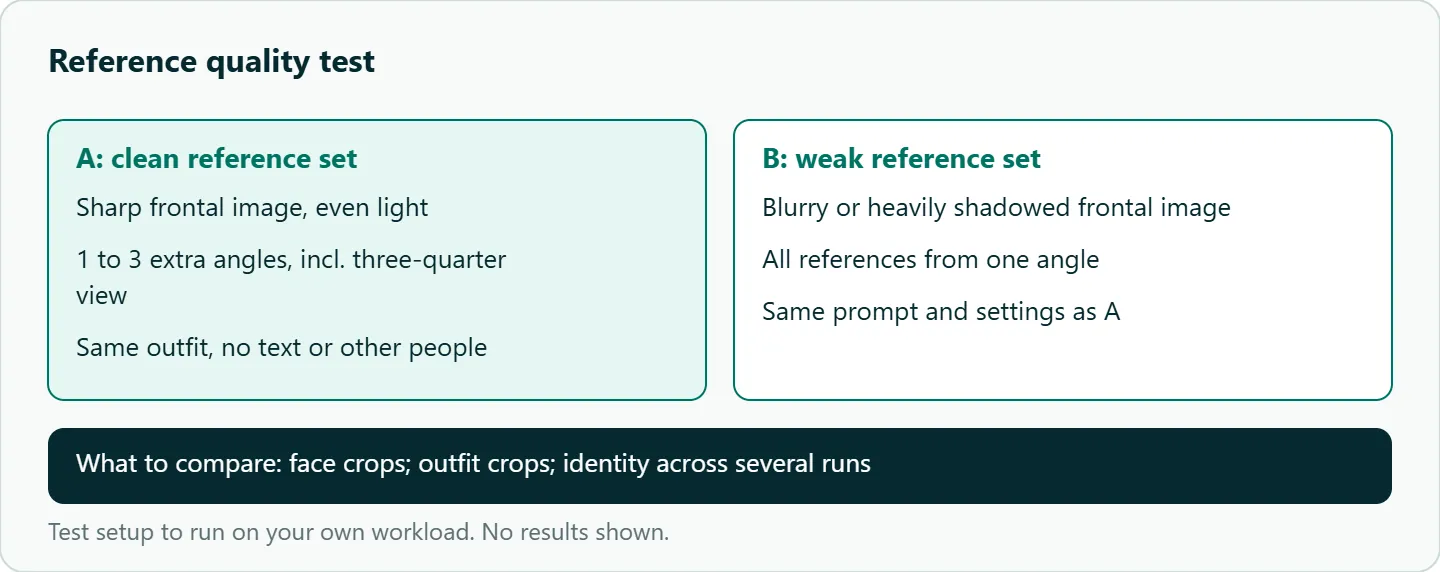
- Build two reference sets for one subject: a clean set (sharp frontal image, one to three extra angles including a three-quarter view, same outfit) and a weak set (blurry or shadowed front, all one angle).
- Send each set in
input_referenceswith the same prompt, model id and duration, several runs per set, since one run is noise. - Compare face and outfit crops across runs, not the whole frame.
- With the clean set, run the same subject in three styles (watercolor, noir, anime) and check whether the face stays recognizable or the style leaks into identity.
- Log how many references each request carried, so you can see whether a fourth angle helped or just used a slot you needed for a prop.
Our take: Spend your effort on references, not on prompt adjectives. A frontal image plus two honest extra angles, stored in your own bucket with a version number, is a better bet than a long description, because the model reads identity from pixels and spends your words on motion. Use elements for recurring subjects and per-request references for one-offs.
Running Kling with references on OceanToken
What works on OceanToken today is per-request reference images: put each image in input_references and describe the subject in the prompt as "the person in the reference image". The snippet in the last section shows that shape with one image; add a second image_url entry for a second angle. We haven't run it, so check the first clip before you batch.
The base URL is https://api.oceantoken.ai/v1, and /kling-api lists kwaivgi/kling-v3.0-pro, kwaivgi/kling-v3.0-std, kwaivgi/kling-video-o1 and kwaivgi/kling-v3.0-omni. The Kling v3.0 Pro model page says it works from reference images. The video guide takes them as input_references entries of type image_url (a public https URL or a data URL, up to 25MB each; keep the whole request under 10MB where you can). The guide doesn't document passing a saved Kling element_id or how @ names map to attached images, so send the images themselves and test the naming on one short clip, which is one more reason to keep the reference set in your own storage.
Two details make references easier to debug here. A reference the model can't use is refused with a 400 rather than silently dropped, and the guide's example error reads "kwaivgi/kling-v3.0-std takes at most 6 reference images; 7 were sent." Before a batch, call https://api.oceantoken.ai/oceantoken/video/model-spec?model=<id> and read referenceLimits for the exact id. One key and one prepaid balance also cover Seedance, Hailuo and Veo, so the same reference set can be tried on another model by changing the model string, and a failed video job releases its hold instead of being charged. For async jobs in automation tools, see our Kling n8n and Make workflow. See the current rate on /kling-api.
FAQ
What is the difference between Elements and reference images? An element is a named, stored subject you create once and reuse by element_id. Reference images are attached to a single request and referred to by position, such as @image_1.
How many images go into one Kling element? For a multi-image element on 3.0 Omni, one frontal image plus 1 to 3 additional reference images that differ from the front.
Can I use a video as an element? Kling's 3.0 Omni docs allow one 3 to 8 second, 1080P clip for realistic humanoid characters on newer models. If the clip contains speech, it also triggers voice customization.
Why does my element drift? Usually a weak frontal image, references from a single angle, conflicting words in the prompt, or names that overlap.
Can I combine elements with a first frame? Yes, first frame or first plus last frame, with at most 3 elements. Last frame alone is not supported on 3.0 Omni.
Sources
- Kling API docs: 3.0 Omni elements (checked 2026-11-09)
- Kling API docs: 3.0 Omni video (checked 2026-11-09)
- OceanToken docs: video guide (checked 2026-11-09)
- OceanToken Kling API page (checked 2026-11-09)
- OceanToken Kling v3.0 Pro model page (checked 2026-11-09)
Get your OceanToken API key
- Create an OceanToken account and an API key.
- Copy the snippet below, paste your key, and run it.
- Check the current rate on /kling-api.
curl https://api.oceantoken.ai/v1/videos \
  -H "Authorization: Bearer $OCEANTOKEN_API_KEY" \
  -H "Content-Type: application/json" \
  -d '{"model": "kwaivgi/kling-v3.0-pro", "prompt": "The person in the reference image walks toward camera on a quiet street, slow push-in", "input_references": [{"type": "image_url", "image_url": {"url": "https://example.com/hero-front.png"}}]}'
More from the blog
A Unified API for Chat, Image and Video
Building on a unified API for chat, image and video: sync vs async calls, billing units, retries, timeouts and storage, with three calls and a launch checklist.
Kimi K3 API International Access Guide
Use the Kimi K3 API internationally: sign up with email, pay by card, create one key and call moonshotai/kimi-k3 with an OpenAI SDK. Steps, code and checks.
Call Tencent Hy3 With the OpenAI SDK
Call Tencent Hy3 with the OpenAI SDK outside China: base URL, model id, streaming, tool calls, reasoning_effort values, Hy3 vs Hy3 preview, and token billing.